
Written by: Abel Torres, Daniel S. Brehony
Illustrated by: Sabine Deviche
Illustrated by: Sabine Deviche
Axis: the imaginary line that cuts through the center of a planet and connects the north and south poles...... more
Equator: an imaginary line along the middle of the Earth, going from side to side.
Hemisphere: one half of a planet. Earth is divided into the northern and southern hemispheres, which are separated by the equator.
Horizontal: a position that goes from side to side, like when you lie down.
Poles: opposite ends of the Earth, (North and South)
Tilt: when an object is angled to one side
Vertical: a position that goes straight up and down, like when you are standing up.
Why Does the Earth Have Seasons?
Have you ever thought about your favorite season, and why it looks and feels the way it does? Depending on where you live, you may experience temperature-based seasons (with cold, warm, and hot months of the year), or climate-based seasons such as dry and wet. This activity will help you see and understand why Earth has seasons, and the two things that work together to make seasonal changes happen.
Tilt of the Earth Activity
 You will be making your own model “Earth” out of clay and using this in front of a battery-powered tap light bulb to see how much light shines on the Earth during certain seasons. You will revolve your Earth model around in a counter-clockwise circle to observe and record how much light shines on each of your hemispheres during each season.
Through this activity, you will see how parts of the Earth other than your own experience seasons, with different amounts of sunlight intensity. Ask yourself how the tilt of our Earth’s axis, along with the yearly revolution Earth makes around the Sun, might affect the seasons where you live.
What You Need
 1 package of non-drying modeling clay
- 1 toothpick
- 1 anywhere tap light (can be purchased in any major retail chain store’s electrical or hardware section)
- 1 roll masking tape
- 1 Protractor
- 1 30 cm (12'') ruler
- 1 meter stick
- 1 paper blotter (to kep table areas clean- may be folded paper towel or a small sheet of construction paper- should measure no more then 4'' [10 cm] square)
- 1 pencil (per person)
- 1 Science notebook (per person)
Before You Begin
Be sure that the batteries in your tap light work; this is essential to your success with this activity!
Be sure to work with your clay on the paper blotter- this will protect your desk from getting the oils in the clay on it and making a mess.
Have your Science notebook and a sharp pencil ready to record what you see. By revolving your clay sphere around the tap light, you will be observing the effect of how intensely sunlight falls on the Earth at different times of the year.
Your Science notebook can be used to record observations of how the light will fall on your sphere, and it is a good idea to sketch the amount of light you see on the sphere as you revolve it around the tap light to give you an understanding of different seasons.
Read Switching of Seasons to make sure you’re familiar with the different kinds of seasons and get a first look at why seasons occur in some areas of the world.
Procedure
- You are going to make two things out of the clay: a sphere and a base to set the sphere on. First, break off a chunk of modeling clay and make a small sphere which measures around 2 inches in diameter. Using a smaller chunk of clay, make a thin, flat clay base wide enough and thick enough so that the sphere will rest securely on it. Be sure to use the paper blotter when making these so that you keep your desk clean.
- Push a toothpick directly into the top center of the sphere (North Pole) and continue pushing gently until the toothpick comes out the bottom of the sphere (South Pole). Make sure that each end of the toothpick shows through the sphere at the North and South poles. The toothpick now represents the Earth’s axis.
- Holding the toothpick straight up and down at a 90-degree angle (double check this angle using the protractor), etch a line around the center of the sphere with the pencil- this will represent the equator.
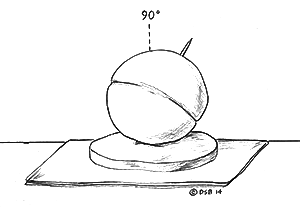 Place the clay base in the center of the paper blotter. Place the protractor on the paper blotter behind the clay base- have a partner hold the protractor to keep it steady. Position the sphere representing the Earth onto the clay base. With the protractor behind, have a team member visually determine where the 66.5-degree mark is located on the protractor, then position the sphere so that the toothpick is directly in line with the 66.5-degree mark on the protractor. When the toothpick is in line with the 66.5-degree mark, this represents the 23.5-degree tilt of Earth on its axis. (Please see illustration on Figure 1.)
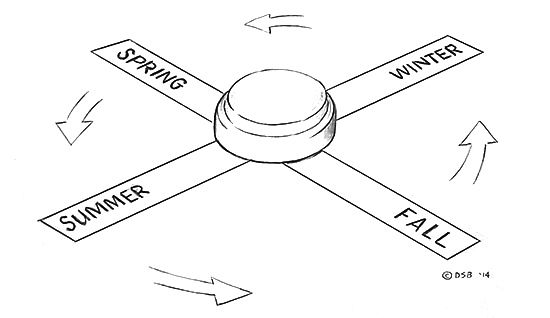
- Now, construct the “Sun” area by first peeling off a 40 cm strip of masking tape. Use the meter stick to measure accurately. Place this strip down carefully on a desk or table. Next, peel off another 40 cm strip of masking tape and place this over the first strip on the desk or table, using the ruler to make sure the arms are equal (each arm should be about 20 cm long). Make sure the second piece of tape crosses the first piece at a 90° angle to the original strip (use a protractor to measure accurately). You should now have the shape of a cross.
- Next, label the four arms of the cross at each end. With the tape cross directly in front of you, start with the arm of the cross at the bottom, and label it “summer.” Then, label the top arm of the cross directly opposite summer with “winter.” Label the arm of cross to the left with “spring”, and the arm of the cross to the right with “fall”. You should now have the name of one season on each arm of the cross.
- Place one (1) tap light in the center of the cross made with the tape strips. Turn the tap light on by pressing it gently at the top. The light should give off a steady glow. Now, ready the room by turning off the lights. (Please see illustration of Steps 6 and 7 on Figure 2.)
- Set your sphere and clay base in front of the tap light at the bottom arm of the cross labeled “summer”; the sphere should stay resting on the base, because it is already at its proper 23.5-degree tilt. The sphere and the base should point at the tap light so that the northern hemisphere is facing the tap light- use the toothpick as a guide to help you get this aligned correctly. Observe which hemisphere gets the most direct light, and record and sketch what you see in your Science notebook.
- Now, for the “revolution” part of this activity: Slowly revolve the sphere in a counter-clockwise fashion around the tap light; be sure to keep the sphere’s angle (as shown by the toothpick) at the same original position when revolving it. When you revolve to the strip labeled “fall”, what do you see? On which hemisphere does the light shine, or does the light appear to shine equally on the northern and southern hemispheres? Observe, record, and sketch what you see in your Science notebook.
- Continue to move your sphere to “winter” and “spring” positions. Observe how the light falls on each hemisphere from each angle, and record in your Science notebook.
Dan Brehony is a 5th Grade Science teacher at San Tan Elementary School in Higley, Arizona. Dan has been teaching 5th Grade for twelve years, and teaching 5th Grade Science exclusively in a departmentalized setting for 3 years. Abel Torres is currently a teacher candidate at Arizona State University’s Mary Lou Fulton College of Education, and has been working with Mr. Brehony’s 5th Grade Science students for the 2013-2014 school year.
Additional images via Wikimedia Commons. Fall leaves by flemming christiansen.
Read more about: Seasoned to the Tilt
You may need to edit author's name to meet the style formats, which are in most cases "Last name, First name."
https://askabiologist.asu.edu/experiments/seasoned-tilt
Bibliographic details:
- Article: Seasoned to the Tilt
- Author(s): Abel Torres, Daniel S. Brehony
- Publisher: Arizona State University School of Life Sciences Ask A Biologist
- Site name: ASU - Ask A Biologist
- Date published:
- Date accessed:
- Link: https://askabiologist.asu.edu/experiments/seasoned-tilt
APA Style
Abel Torres, Daniel S. Brehony. (). Seasoned to the Tilt. ASU - Ask A Biologist. Retrieved from https://askabiologist.asu.edu/experiments/seasoned-tilt
American Psychological Association. For more info, see http://owl.english.purdue.edu/owl/resource/560/10/
Chicago Manual of Style
Abel Torres, Daniel S. Brehony. "Seasoned to the Tilt". ASU - Ask A Biologist. . https://askabiologist.asu.edu/experiments/seasoned-tilt
Abel Torres, Daniel S. Brehony. "Seasoned to the Tilt". ASU - Ask A Biologist. . ASU - Ask A Biologist, Web. https://askabiologist.asu.edu/experiments/seasoned-tilt
For more info, see http://owl.english.purdue.edu/owl/resource/717/04/
MLA 2017 Style
Modern Language Association, 7th Ed. For more info, see http://owl.english.purdue.edu/owl/resource/747/08/
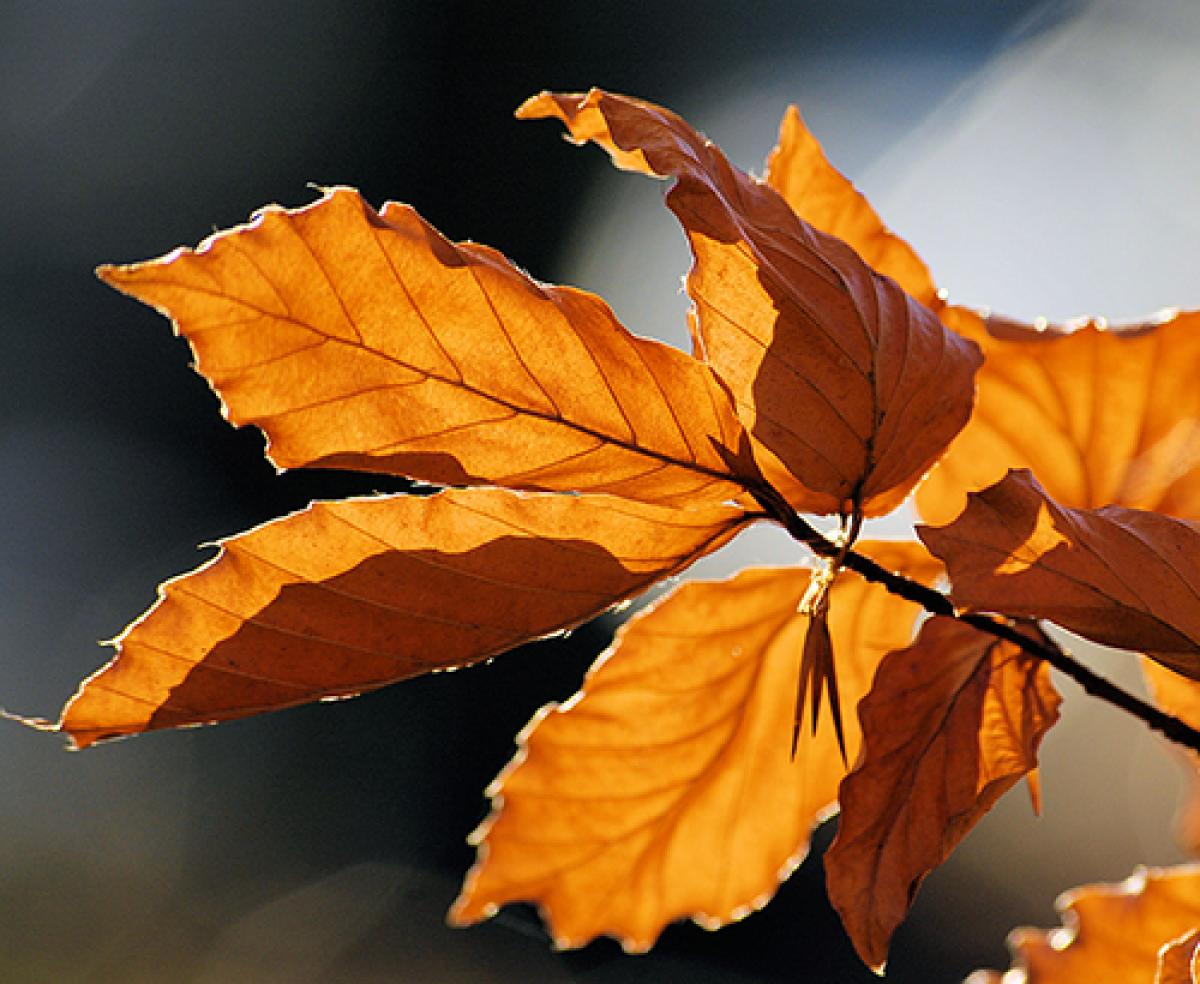
Some tree leaves change color in the fall.
What is the reason for the seasons? Check out our companion story, Switching of Seasons, to learn more.
Be Part of
Ask A Biologist
By volunteering, or simply sending us feedback on the site. Scientists, teachers, writers, illustrators, and translators are all important to the program. If you are interested in helping with the website we have a Volunteers page to get the process started.